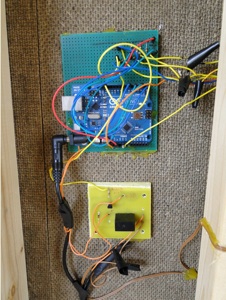
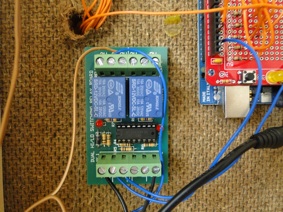
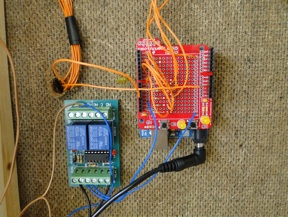
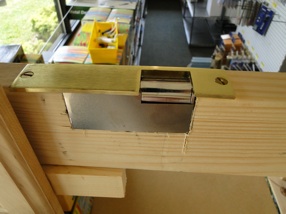
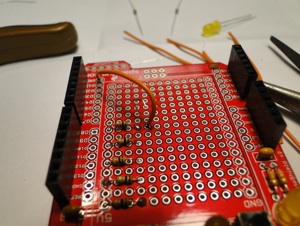
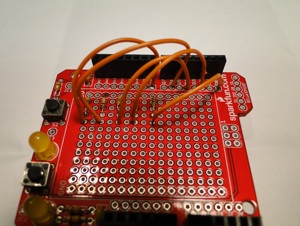
Then connect the positive terminal of the power supply to the positive connection on your electronic door strike. Connect the negative connection on the door strike to the normally open (NO) terminal block on the CPS156. The build is now complete. Now you are ready to configure the sketch and install in on the Arduino.
The Software
Here I will explain how the software works so that you can easily change it to meet your needs.
Here is a link to download the: Arduino Door Lock Sketch.
Now lets look at the code:
//You’ll see that we start with some constants.
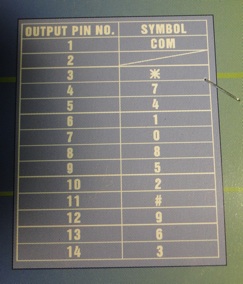
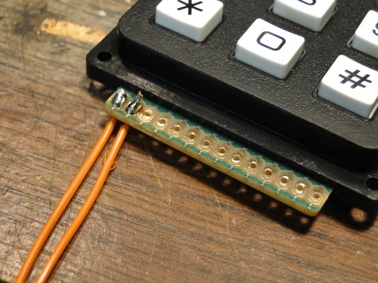
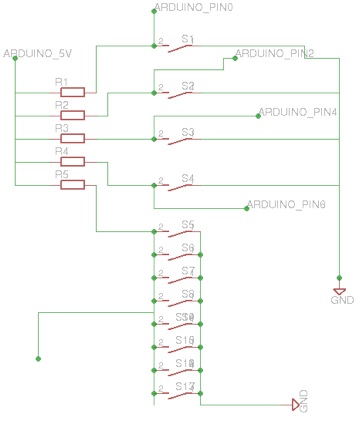
const int buttonPin1 = 0;
const int buttonPin2 = 2;
const int buttonPin3 = 4;
const int buttonPin4 = 6;
const int buttonPinKill = 8;
const int RelayPin = 13;
const int LEDPin = 12;
/*These set up constant number values for the pins. They cannot be changed anywhere by the program.
Then we have variables:*/
int buttonState1 = 0; // variable for reading the pushbutton status
int buttonState2 = 0;
int buttonState3 = 0;
int buttonState4 = 0;
int buttonState8 = 0;
int combCheckSum = 0;
//They can change
/* Next is the main setup method, it prepares the Arduino for the rest of the program by telling it which pins are used for what.
*/
void setup() {
// initialize the Relay pin and LED as outputs:
pinMode(RelayPin, OUTPUT);
pinMode(LEDPin, OUTPUT);
// initialize the pushbutton pins as inputs:
pinMode(buttonPin1, INPUT);
pinMode(buttonPin2, INPUT);
pinMode(buttonPin3, INPUT);
pinMode(buttonPin4, INPUT);
pinMode(buttonPinKill, INPUT);
}
//After the setup method comes the Main loop. This method gets run repeatedly thousands of times per minute. There is a lot to cover here so I will place comments throughout the code.
void loop(){
// read the state of the pushbuttons value:
buttonState1 = digitalRead(buttonPin2);
buttonState2 = digitalRead(buttonPin6);
buttonState3 = digitalRead(buttonPin7);
buttonState4 = digitalRead(buttonPin0);
buttonState8 = digitalRead(buttonPinKill);
// check if the pushbuttons are pressed.
// if it is, the buttonState is HIGH:
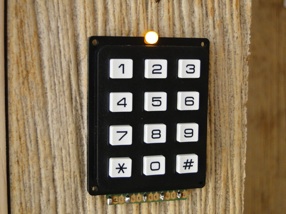
/*The following waits for the first button to be pressed when pressed, it changes the value of the “combCheckSum” variable from 0 to 1000.*/
if (buttonState1 == LOW) {
combCheckSum = 1000;
}
/*then we check to see if any other buttons have been pressed, if so the checksum value is reset.*/
if (buttonState8 == LOW) {
combCheckSum = 0;
}
/*same as above only for button 2, it also checks to make sure button 1 is not still pressed, if all these statements return “TRUE” it makes the checksum 1200*/
if (buttonState2 == LOW) {
if (buttonState1 == HIGH) {
if (combCheckSum == 1000) {
combCheckSum = 1200;
}
}
else {
combCheckSum = 0;
}
}
if (buttonState8 == LOW) {
combCheckSum = 0;
}
/*same as before, checking the state of button 3 this time. if these return TRUE checksum becomes 1230*/
if (buttonState3 == LOW) {
if (buttonState2 == HIGH) {
if (combCheckSum == 1200) {
combCheckSum = 1230;
}
}
else {
combCheckSum = 0;
}
}
if (buttonState8 == LOW) {
combCheckSum = 0;
}
/*final check, looks at button 4, if all all the statements return TRUE the value of checksum becomes 1234.*/
if (buttonState4 == LOW) {
if (buttonState3 == HIGH) {
if (combCheckSum == 1230) {
combCheckSum = 1234;
}
}
else {
combCheckSum = 0;
}
}
if (buttonState8 == LOW) {
combCheckSum = 0;
}
/*unlock the door. if the following returns TRUE, the relay pin will become active and the door will unlock. It will stay unlocked for 3 seconds, or 3000 milliseconds, then close again.*/
if (combCheckSum == 1234) {
digitalWrite(RelayPin, HIGH);
delay(3000);
digitalWrite(RelayPin, LOW);
combCheckSum = 0;
}
}
And thats the code. Relatively simple right? Upload it to your Arduino and if you did everything right you will have a working door lock.
-Tanner Ewing
Support Manager
Leave your questions or comments in the forum box below.